Step-by-Step Guide
Documentation
Complete guide for installing and managing your GastroFox.eu system.
📚 Table of Contents
Please note that after updates and new features, the documentation images may differ from the current design
⚙️ 1. Installation
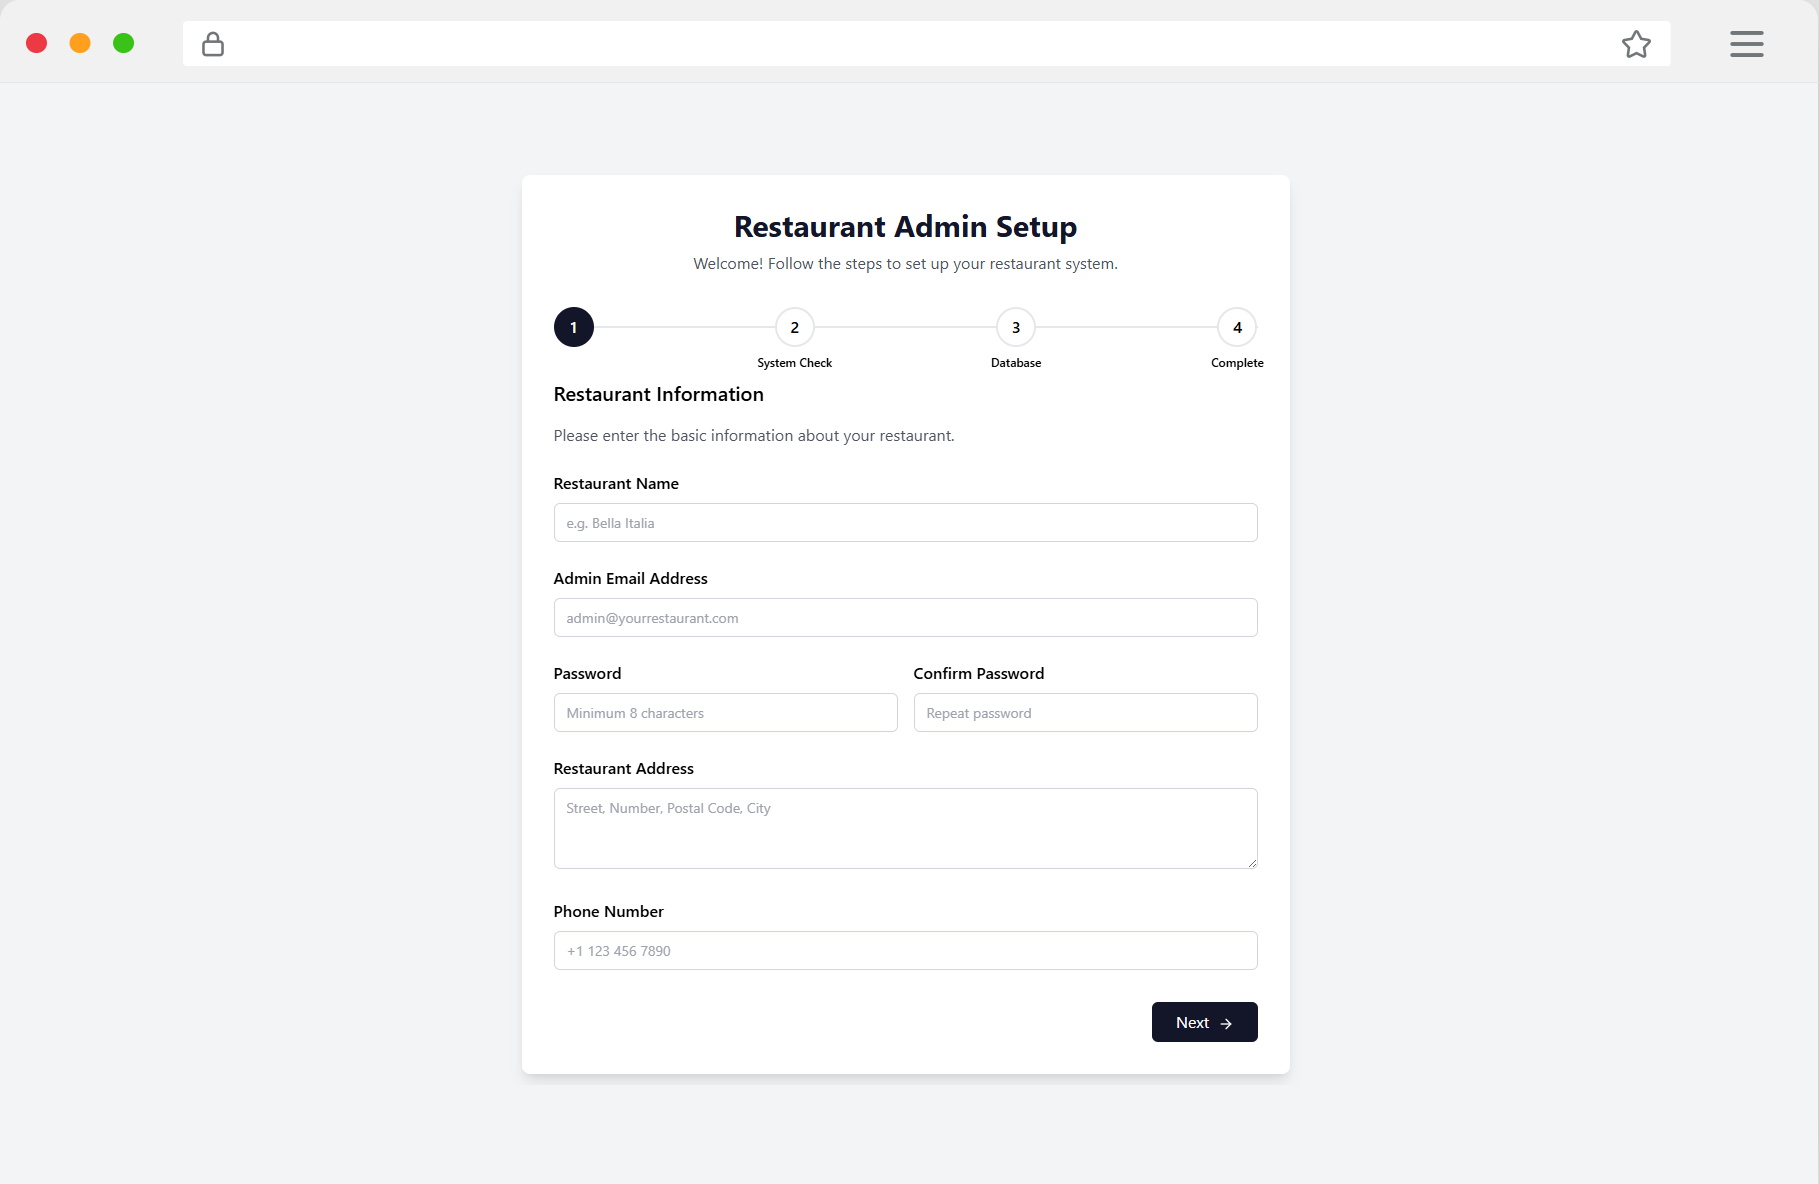
Installing GastroFox.eu is incredibly easy thanks to our intelligent setup wizard. Simply follow these steps:
- Upload files: Upload all GastroFox files to your web hosting directory
- Create database: Create a MySQL database in your hosting panel
- Start setup wizard: Visit your domain - the wizard starts automatically
- Database connection: Enter your database credentials
- Admin account: Create your first administrator account
- Basic settings: Configure restaurant name, address and contact details
💡 Tip: The entire installation process takes only 5-10 minutes. If you encounter any problems, our support team is happy to help.
🔐 2. Login

After successful installation, you can log into your admin area:
- Login URL:
your-domain.com/admin-login - Username: The admin name created during installation
- Password: Your chosen secure password
🔒 Security: Always use a strong password with at least 12 characters, upper and lowercase letters, numbers and special characters.
👨💼 3. Admin Area
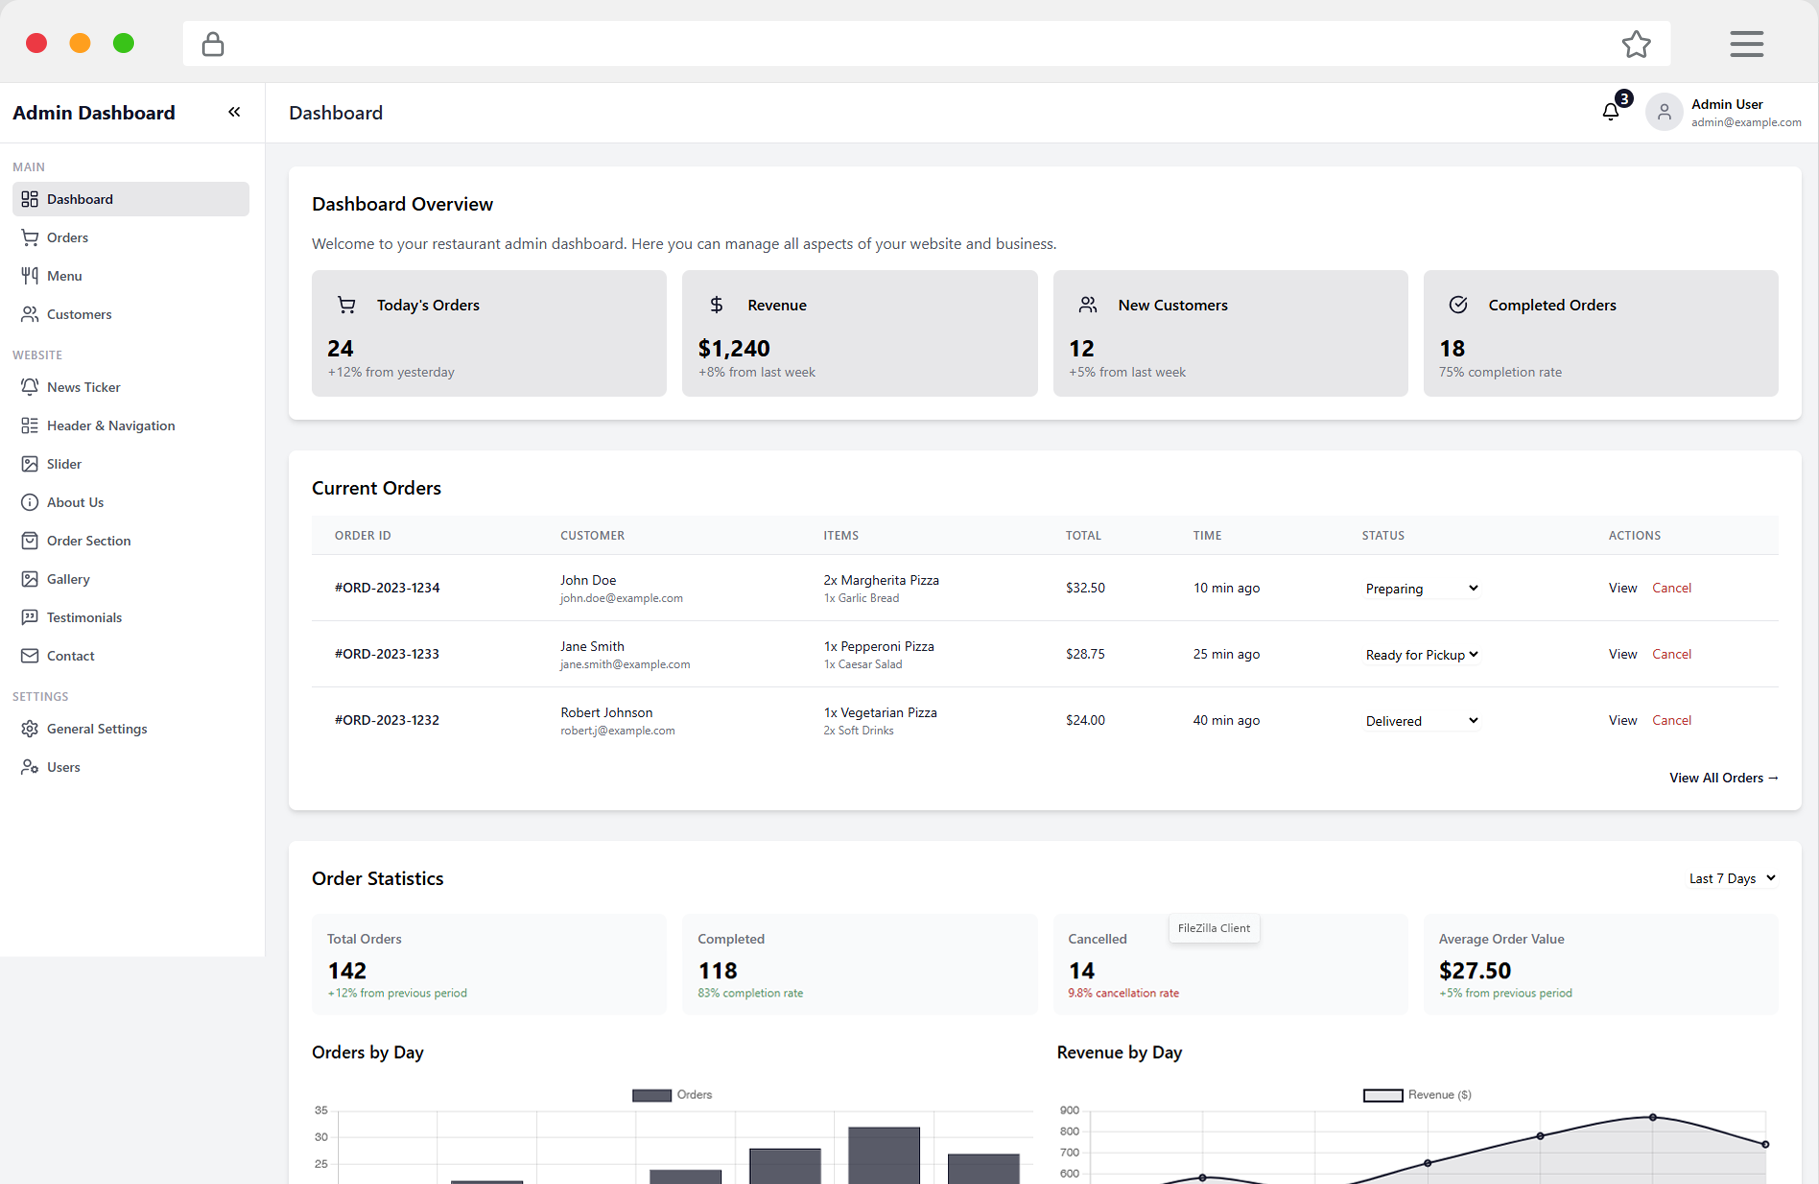
The admin dashboard is your control center for managing your restaurant system:
Dashboard Overview:
- Daily statistics: Revenue, orders and top products
- Current orders: Live overview of all incoming orders
- Quick access: Direct links to important functions
- System status: Monitoring of key system functions
Main Navigation:
- 📊 Dashboard - Overview and statistics
- 🍕 Products - Manage menu and categories
- 📋 Orders - Order management
- 👥 Customers - Customer management
- ⚙️ Settings - System configuration
🍕 4. Manage Products
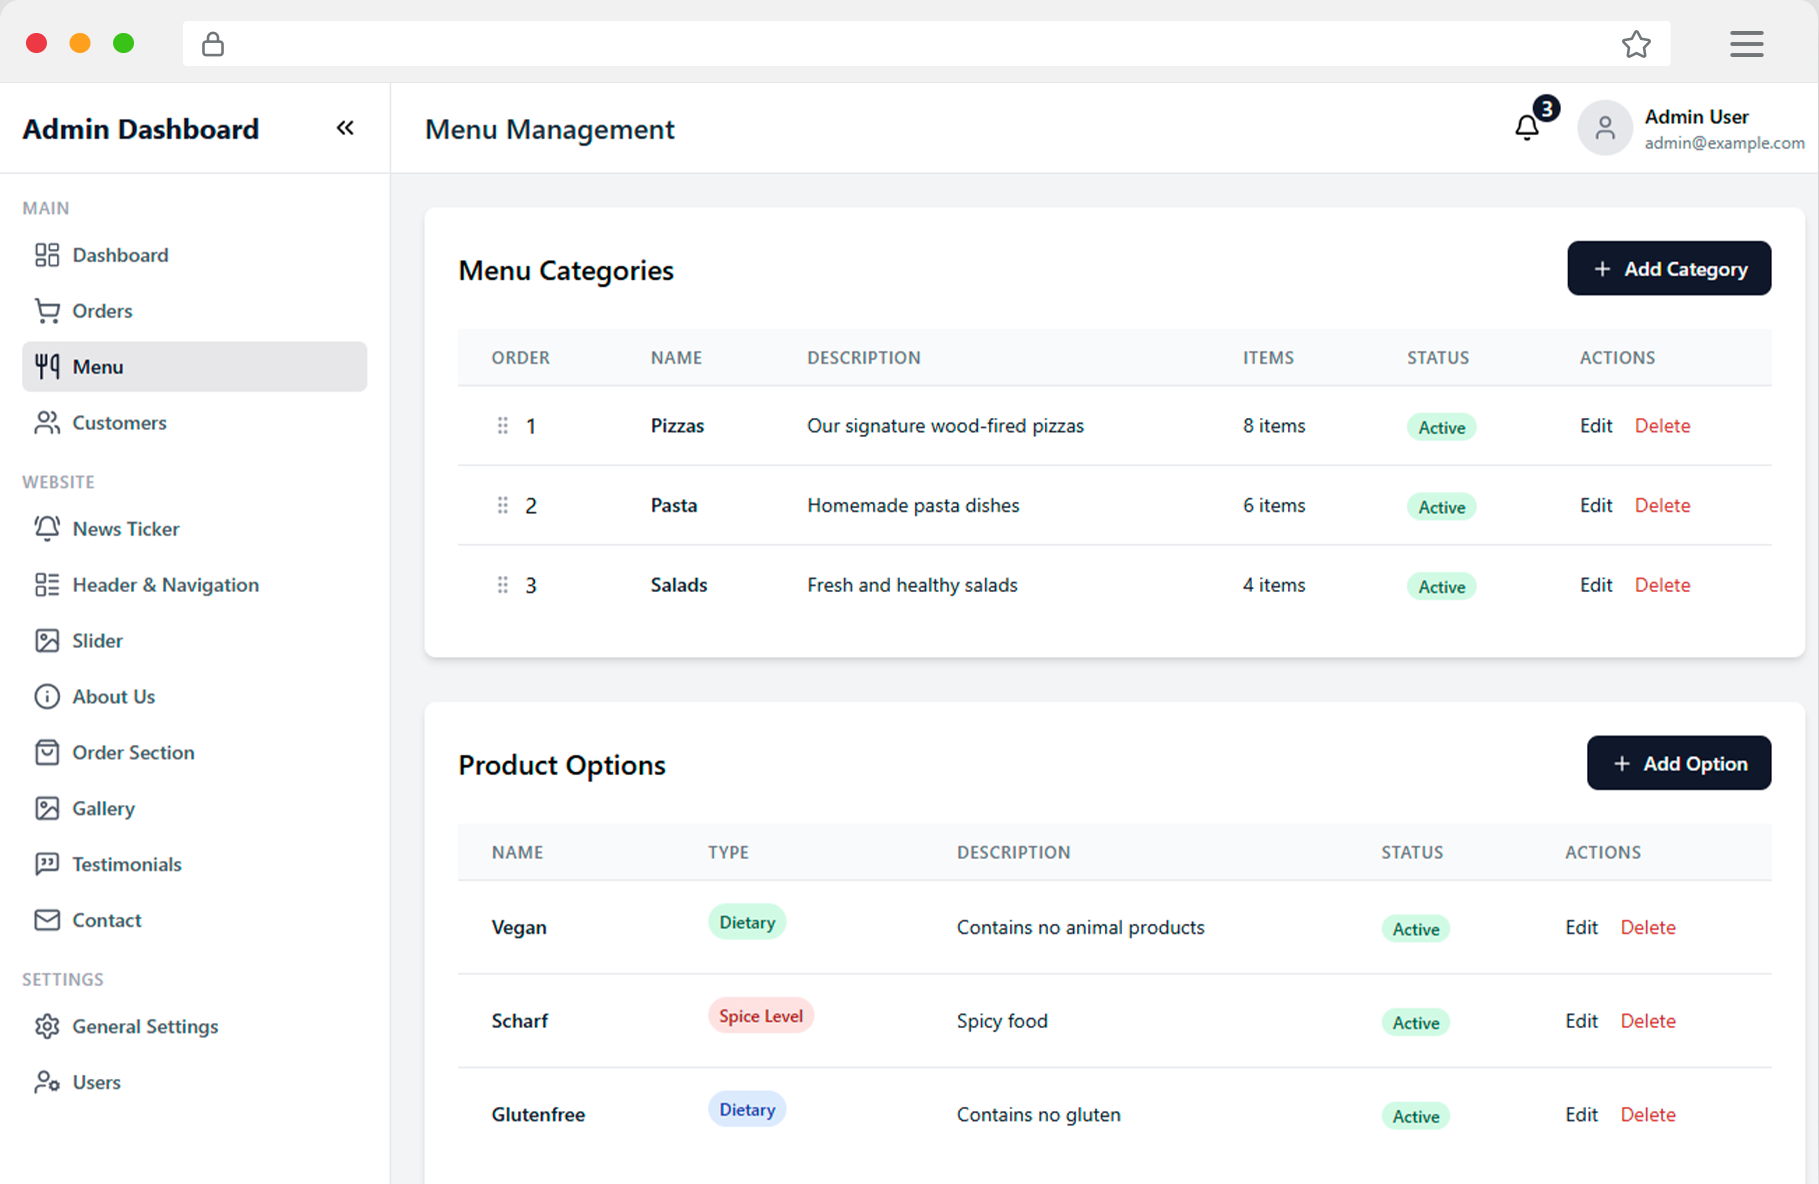
Product management allows you to create and manage your complete menu:
Create Categories:
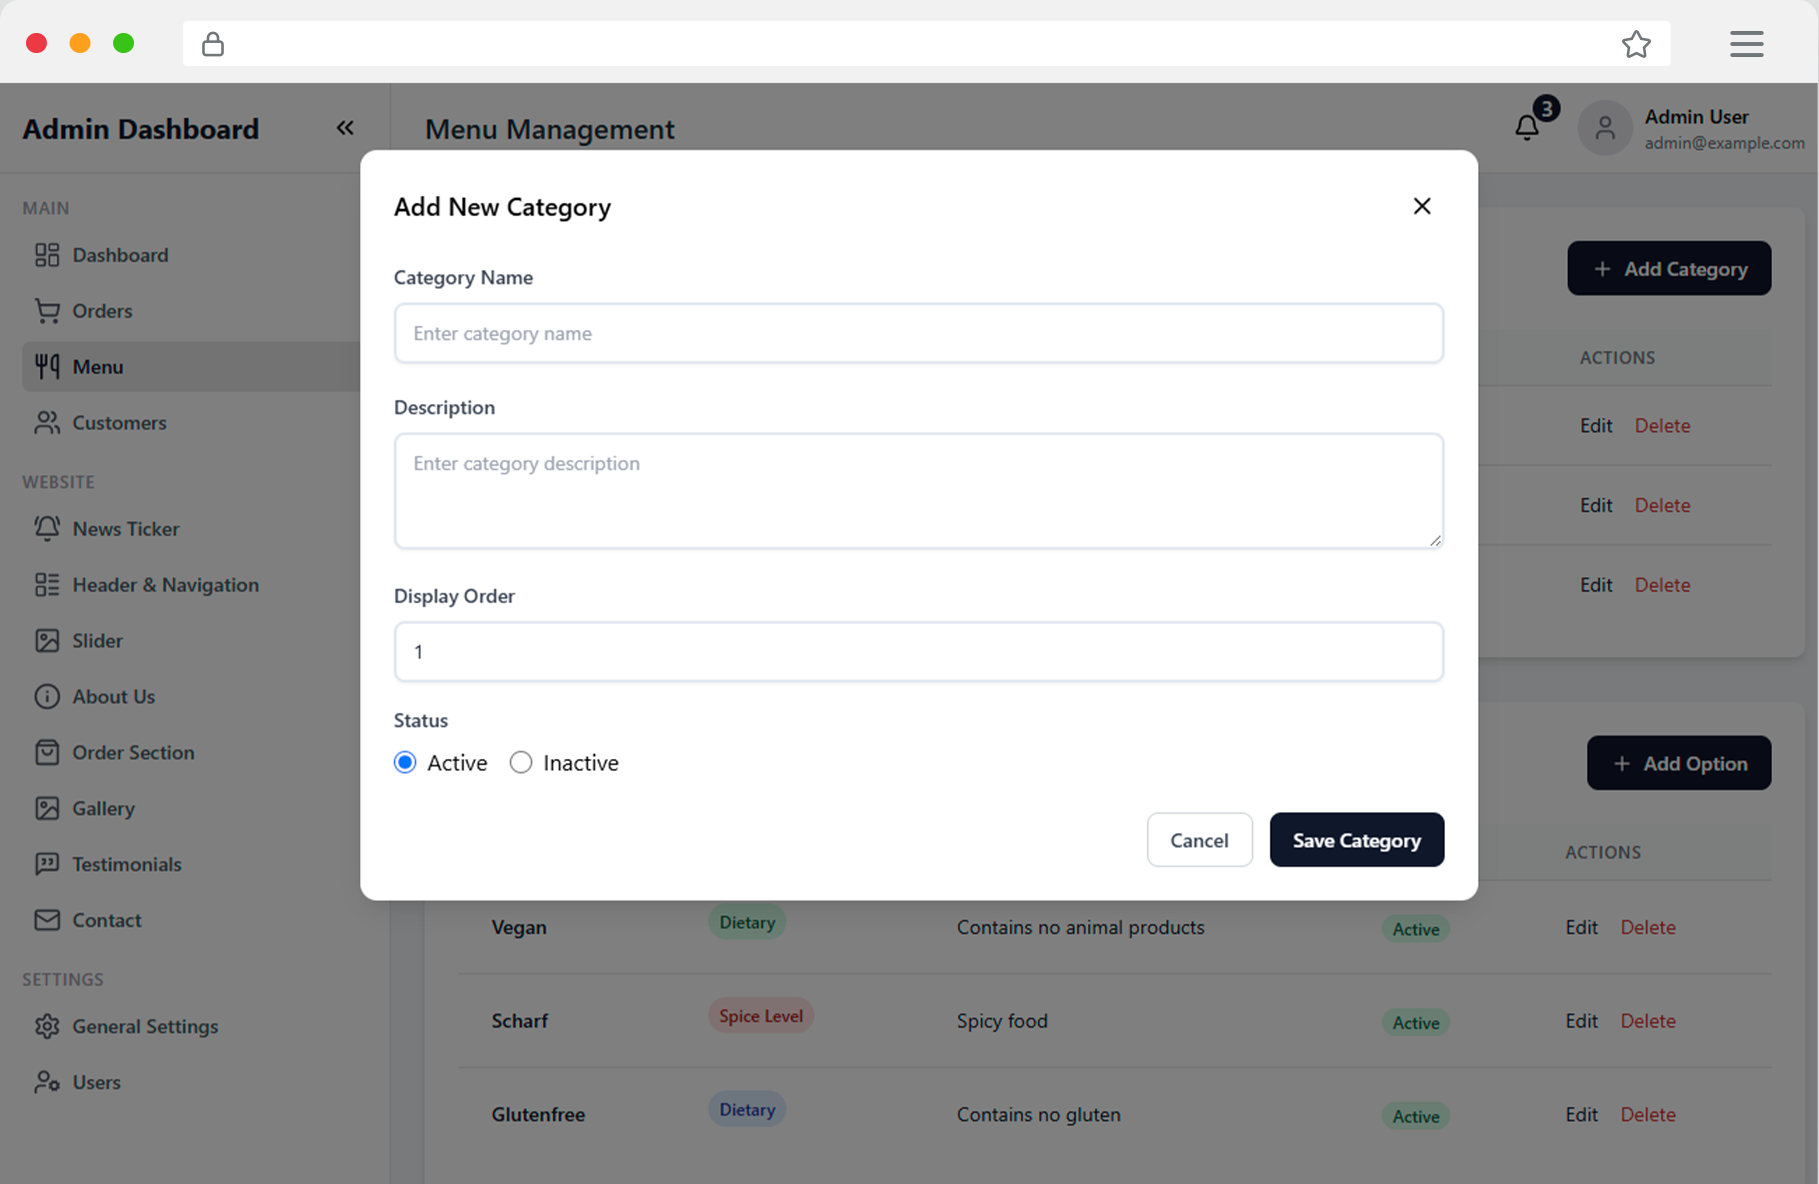
- Click on "New Category"
- Enter name and description
- Upload a category image
- Set the sort order
Add Products:
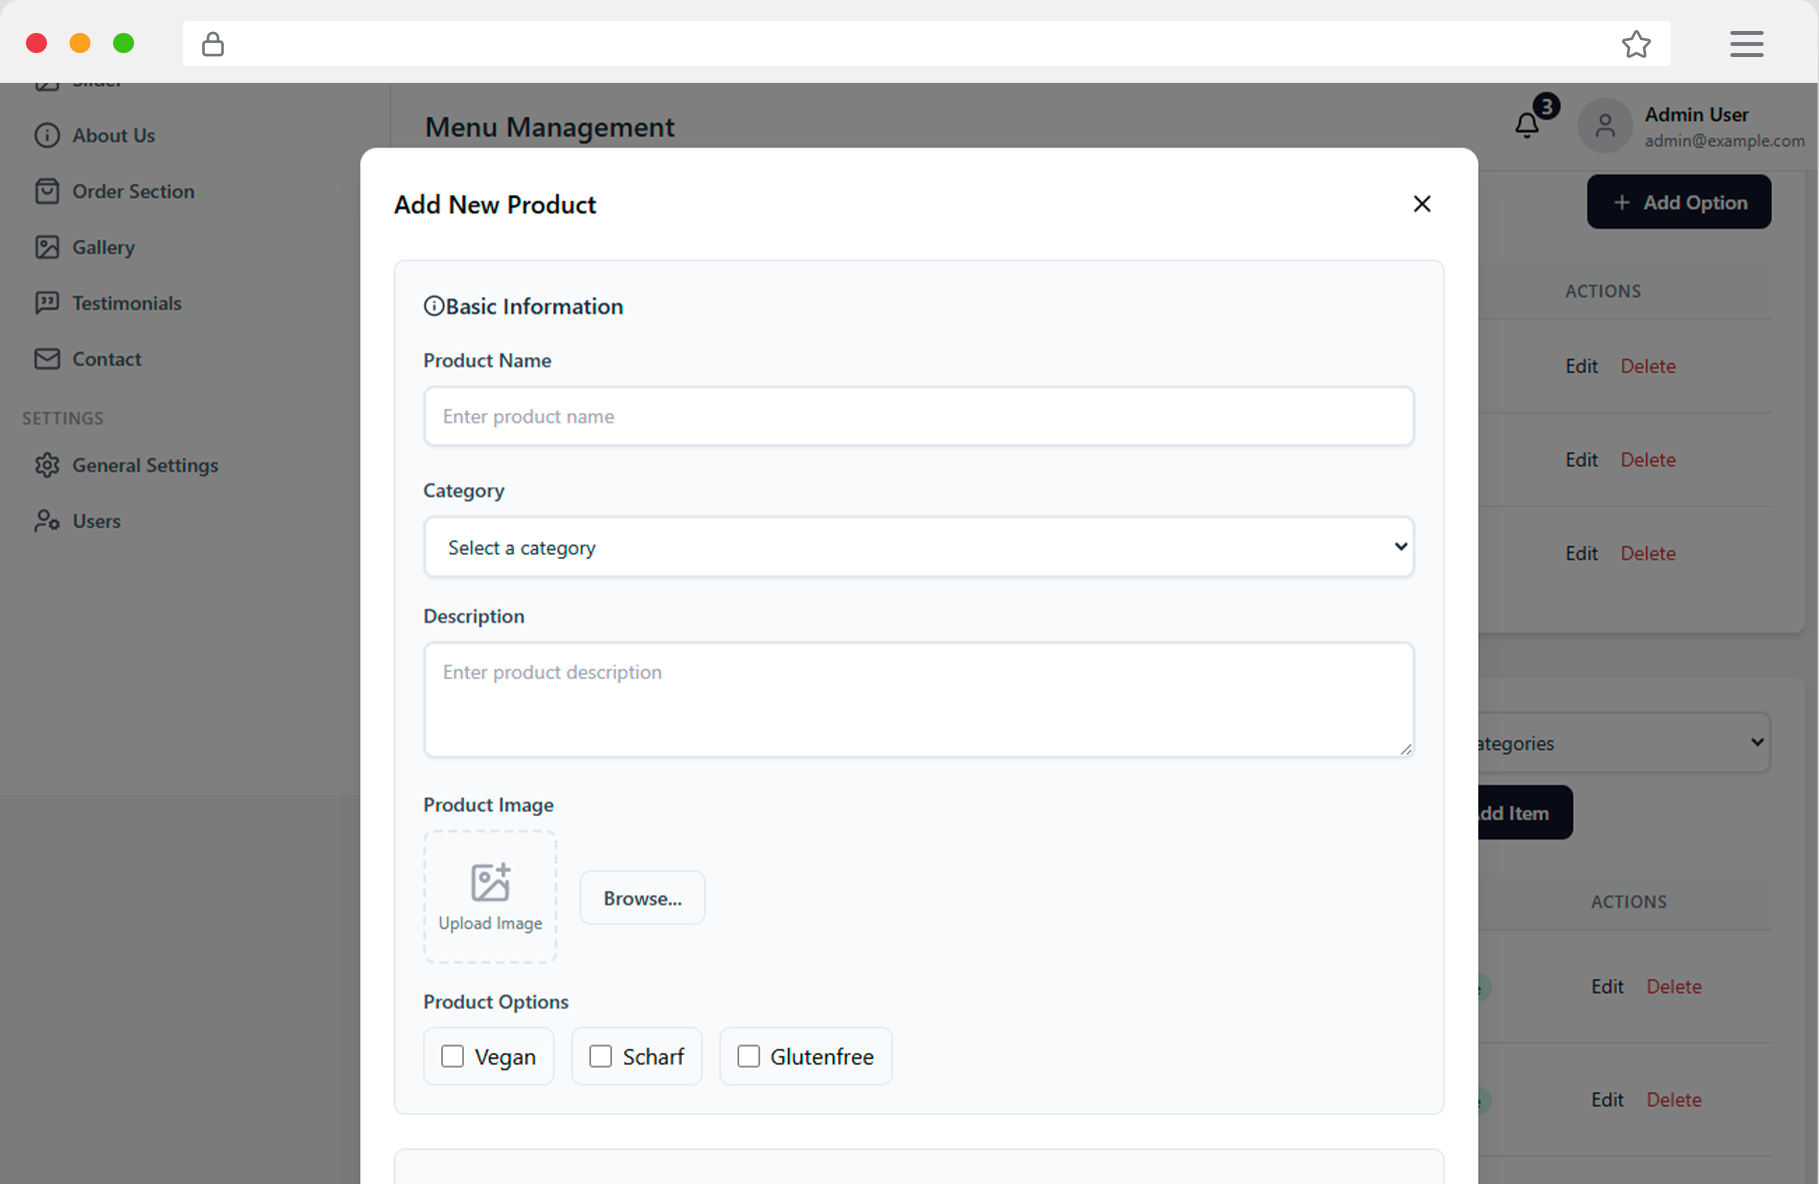
- Select "New Product"
- Choose a category
- Fill in all product details (name, description, price)
- Upload appetizing product images
- Define allergens and additives
- Set availability and variants
📸 Tip: High-quality product images increase sales by up to 30%. Invest in professional food photography.
📋 5. Orders
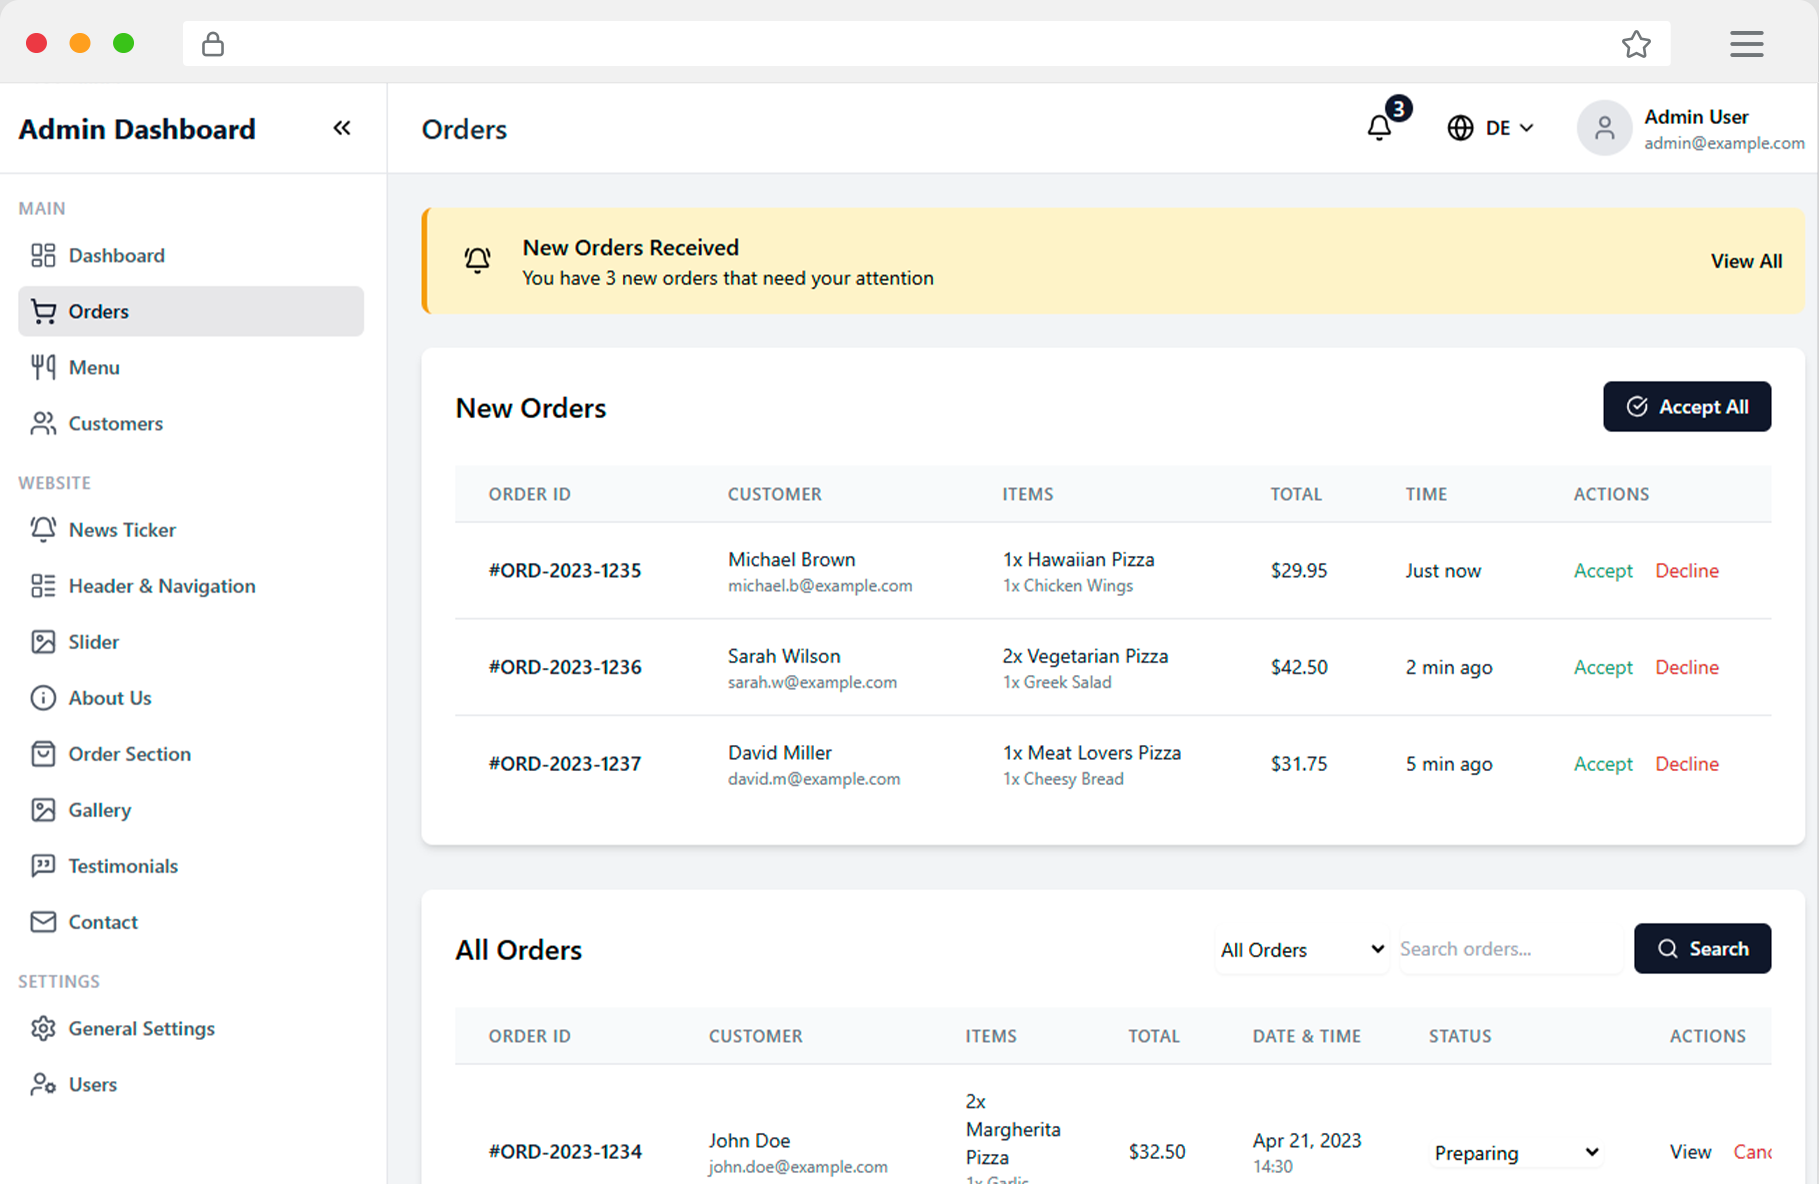
Order management is the heart of your restaurant operation:
Manage Order Status:
- New: Freshly received orders
- Confirmed: Order has been accepted
- In Preparation: Kitchen is working on the order
- Ready: Order is ready for pickup/delivery
- Completed: Order has been successfully handed over
Features:
- 🔔 Live notifications for new orders
- 🖨️ Automatic receipt printing for the kitchen
- 📱 SMS/Email updates to customers
- 📊 Detailed reports and statistics
⚙️ 6. Settings

In the settings, you configure all important aspects of your restaurant system:
Basic Settings:
- Restaurant information: Name, address, contact details
- Opening hours: Daily opening hours and holidays
- Delivery zones: Delivery areas and minimum order values
- Payment methods: Configure PayPal, Stripe, cash payment
Design Customizations:
- Logo and colors: Customize corporate design
- Homepage: Personalize texts and images
- Email templates: Customize automatic emails
- Legal pages: Terms, privacy policy, imprint
🎨 Design Tip: A consistent corporate design strengthens customer trust and increases brand recognition.
